If you read my last post, or are familiar with the subject, you’ll know that observation is crucial in permaculture; because of its great importance, that’s where we’re going to start today.
The designer is the recliner. Finding a good sit-spot.
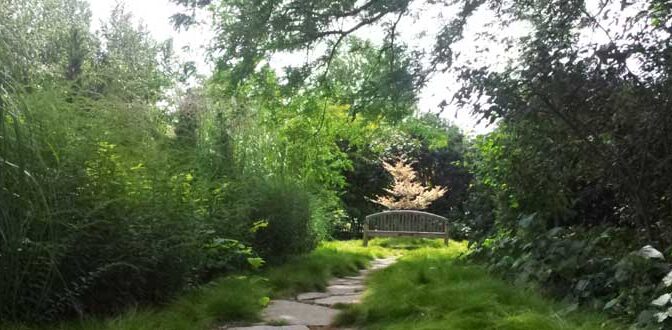
 The first thing you should do is get your mind right… To do that, you should find a good sit-spot. It might sound simple but the sit-spot is crucial for a couple different reasons.
First, you get the obvious benefit of relaxation; being in nature is a meditative and healing experience. Second, nature can teach you a lot of things about your environment, even yourself.
My sit-spot is right outside my back door. I make it a point to go outside every day and become absorbed by the natural world around me. It has been cool to implement some of the stuff I’m learning in my permaculture class and see nature doing the things my teachers described, there is something truly magical about the process.
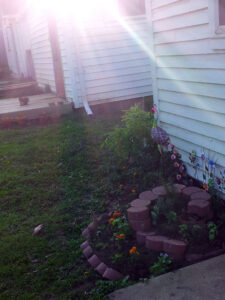
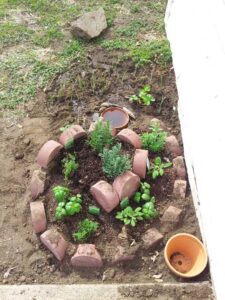
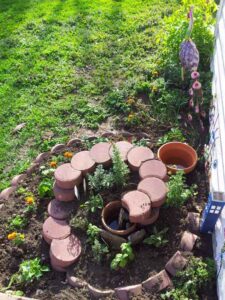
You can see from the pictures below how my garden has evolved since I first installed it a few weeks ago. This is just what you can do with a couple of weeks, imagine what you can do with years. I’ll be talking more about that and the topic of succession planting in a future post. Much of that evolution is caused from looking at what works and doesn’t work and adjusting accordingly. As you can see, my garden has undergone some structural changes.
Utilizing the permie principle of accepting feedback and applying self regulation, we see there are no mistakes, just lessons. Or as Bob Ross says, No Mistakes, just happy accidents. Just remember, it’s always better to learn from other people’s mistakes whenever possible. ;)


What’s nature trying to tell you?
There’s a lot you can learn from looking around outside. Here’s some things you should consider when you’re working on a design project outside. Get a feel for the high and low areas of the land, is there water nearby? How does it interact with the land? Is it dry environment or saturated and marshy?
You can use that information to determine where you might put plants that like dry conditions vs water loving plants. If you live in a dry arid place you can utilize sunken beds to protect your plants from evaporation. If you live in a wet marshy place, you could use raised beds to help drain the soil. I’ll be doing a post soon that goes into lots more detail on soil conditions and improvement.
You might want to ask yourself where the wind is coming from and if there are wind-breaks. You could save yourself a lot of money on heating costs in the Winter by simply utilizing wind breaks like trees or hills to protect your house from cold north winds.
Another important question to ask yourself is where is the location of the sun in the sky? You’ll want to know how the shadows move during the day if you are planting a garden. Then, you can ensure that you are getting the best yield out of the crops you grow. A post on “sun” specific stuff might be handy for the future too, there are a lot of ways you can utilize solar energy in permaculture and they are fascinating.
There’s an infinite amount of information coming at us at all times, what we choose to pay attention to, and how we choose to use that information is totally up to us.
Usually we’re too busy and immersed in our technical worlds to notice the stuff Ma might be trying to tell us. Forget about an internet connection, there’s a whole universal connection to infinite knowledge and experience for those who have eyes to see it. Observing that flow leads to connecting with it and you will soon discover all sorts of insights that will help you in all kinds of different ways.
Zone Mapping: A fun permaculture tool.
One thing I LOVE is the Zone Map. Creating a zone map is a great way to help ensure that you are making the best and most efficient use of the space and resources you have available, combine this with a map showing all those natural features I mentioned earlier and you’ll be ready to rock!
It’s pretty simple and can be applied to many different things, you could do a zone map of your property, a zone map of your office, your kitchen and pantry, your computer files, even a zone map of your town and the places you regularly visit, it’s pretty darn versatile really.
The zones are numbered 0-5 (or more depending on the situation and personal preference). Each zone represents the areas you visit and the frequency you visit them. Zone 0 or 1 would be like ,”you” or your base of operations, like your house or office desk or whatever place you tend to be the most frequently. Zone 5 would be the places you visit the least frequently like once a month or less.
As an example, let’s say we’re doing a zone map of a property.
Zone 0– This is you (or in this case, the inside of your home).
Zone 1– This is the space right outside/around your house, maybe a patio and the flower-beds around your house. This could also be where your sit-spot or kitchen herb garden is located.
Zone 2– A little further from your house this might be the back yard, or where a utility shed is or workshop is located. This is a good spot for stuff you access daily, but don’t want in your way, also a good spot for larger gardens.
Zone 3-This zone works well for places you visit daily and want easy access to but you don’t want right by the house because of factors like smell or noise, like a compost area or chicken coop or greenhouses.
Zone 4–This is for areas you use/visit every couple weeks…maybe orchards.
Zone 5-Places you visit once a month or less. If you live in the city, this could be something like a storage unit. If you are a country dweller, this might be something like wild wooded areas, the back 40.
Like I said before, you can use this for pretty much anything and it works great for helping you to become more efficient and arrange and design things in a convenient way. It also happens to incorporate that permaculture principle of working from the big picture down to details. If you can figure out how you move, you can figure out where to put the stuff you’re moving around, in a nutshell.
Thanks for reading! :)

